Project Description:
In this project, we were given the task to create a stamp and various types prints. It was an introduction to printmaking and the forms of prints we can create. We all created a Relief Print which we used a soft block to use carve out our design. The design could have been anything as long as it represented us. Once carved, we had begun printing with our stamp on proof paper which can be seen as our draft. After we were familiarized with the different printmaking techniques we were allowed to create our final prints.
Process:
We began to work on this project by brainstorming ideas on potential designs in our art notebooks. We had examples of prints available for us to use as a reference. In addition to brainstorming, we had to choose two prints from the examples as a reference. Once we had drawn a sketch of our design, we had to get critique from our peers. This allowed us to improve our design and move forward. We had the choice to draw our design or use a photograph we took. For those who had drawn their design, they needed to scan it. Both options called for editing the image in Photoshop, given that the image needed a black and white filter to allow the design lines to stand out. Along with adding the filter, the image needed to be sized to the measurements of the soft block.
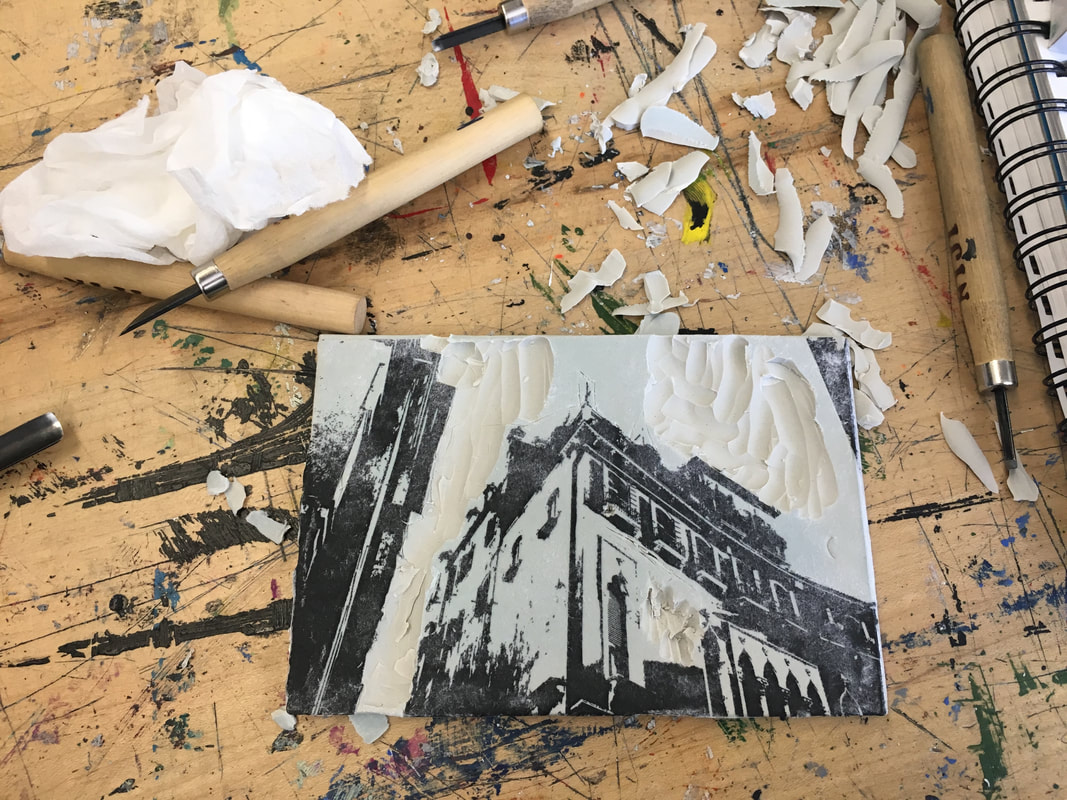
Once the image was printed the transferring process began. The image needed to be cut out and the block had to have a layer of mod podge. The cutout image was placed on top of the block. The next step was to gently scrub off the paper leaving the image on the block, however, before this step the block needed to be completely dry. This could have been achieved by letting the block air-dry or if time was short, a blow dryer would be an alternative.
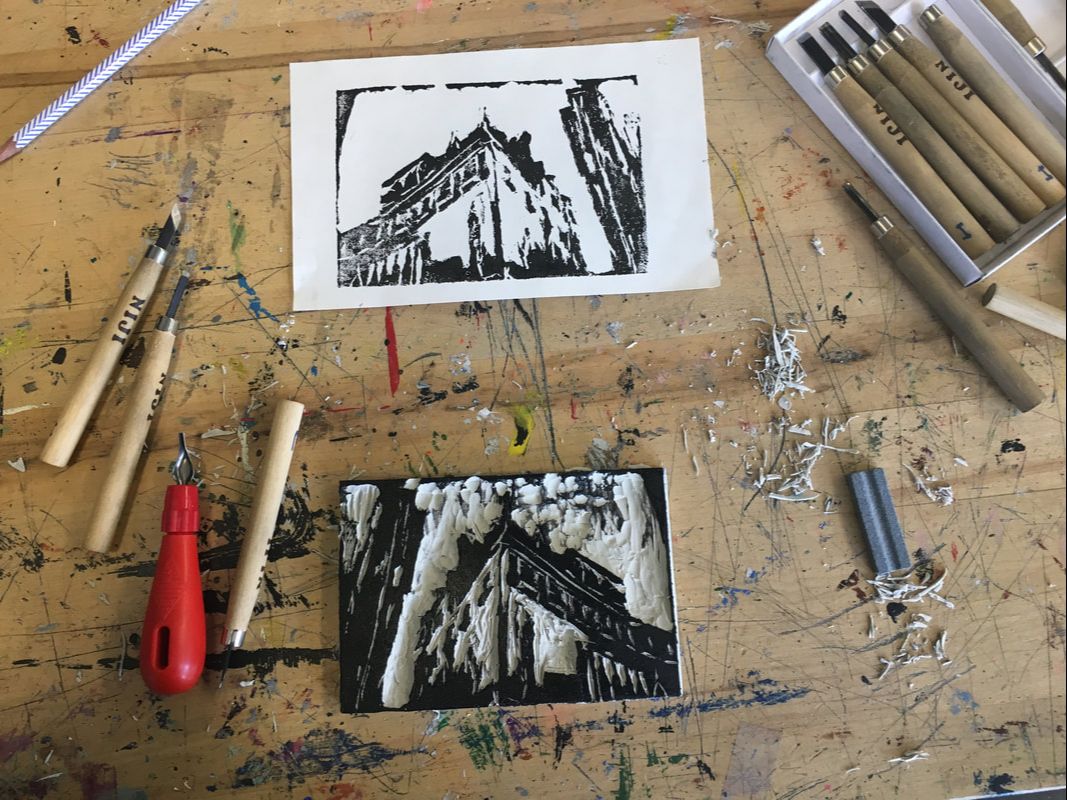
To begin carving, the right carving tools were needed in order to precisely carve out the design. Depending on the student, some decided to carve out the image while others decided to carve out the background.
After carving the design out of the block printing was next step. Before we began printing, the area for printing needed to be set up. The area was set up with Plexi glass, Block Printing Ink, and brayers. To print, we had to create at least two proof paper which was more like our drafts. Our first proof papers we printed out of black ink then as we got familiar with the steps we were then ready to work on the different printmaking techniques.
The hand coloring technique called A la Poupée is just as the name describes it. I decided to use watercolor as my background, in order to this I has to trace the outline of my design onto the paper. This would allow me to paint around the design.
The color paper technique called Chine Collé is another printmaking technique we used for our final prints. I began to do this by tracing the outline of the buildings or the background on colored paper. Once traced, the outline had to be cut out and glued to the paper where the stamp would print. Both of these techniques were required for our final prints.
Once the image was printed the transferring process began. The image needed to be cut out and the block had to have a layer of mod podge. The cutout image was placed on top of the block. The next step was to gently scrub off the paper leaving the image on the block, however, before this step the block needed to be completely dry. This could have been achieved by letting the block air-dry or if time was short, a blow dryer would be an alternative.
To begin carving, the right carving tools were needed in order to precisely carve out the design. Depending on the student, some decided to carve out the image while others decided to carve out the background.
After carving the design out of the block printing was next step. Before we began printing, the area for printing needed to be set up. The area was set up with Plexi glass, Block Printing Ink, and brayers. To print, we had to create at least two proof paper which was more like our drafts. Our first proof papers we printed out of black ink then as we got familiar with the steps we were then ready to work on the different printmaking techniques.
The hand coloring technique called A la Poupée is just as the name describes it. I decided to use watercolor as my background, in order to this I has to trace the outline of my design onto the paper. This would allow me to paint around the design.
The color paper technique called Chine Collé is another printmaking technique we used for our final prints. I began to do this by tracing the outline of the buildings or the background on colored paper. Once traced, the outline had to be cut out and glued to the paper where the stamp would print. Both of these techniques were required for our final prints.
|
|
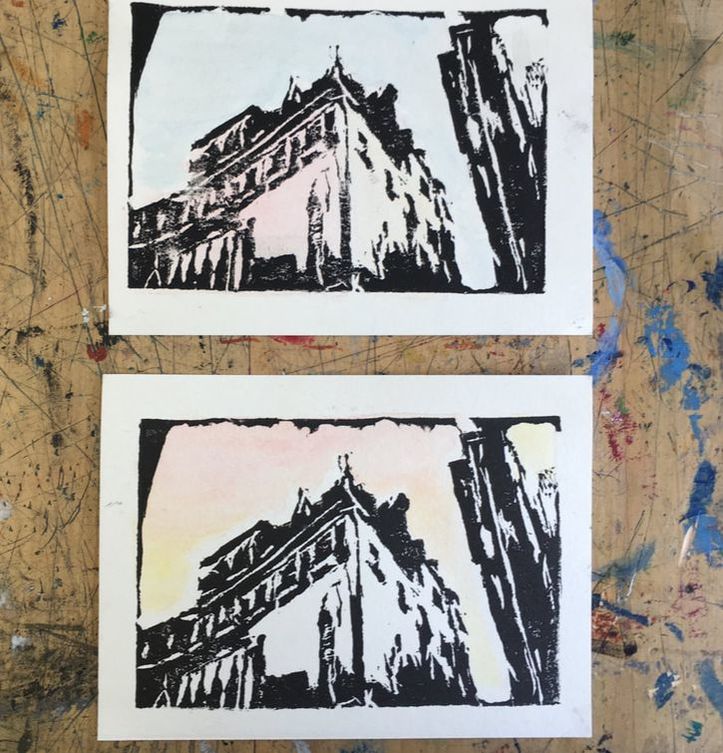
Final Prints:
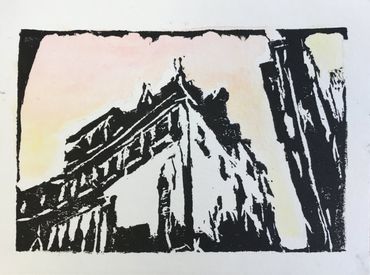
A la Poupée- hand coloring technique
|
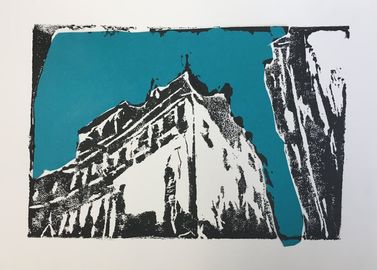
Chine Collé- colored paper technique
|
Artist Statement:
A day in Venezia
By Leslie Aguilar Ramos
By Leslie Aguilar Ramos
Subject Matter:
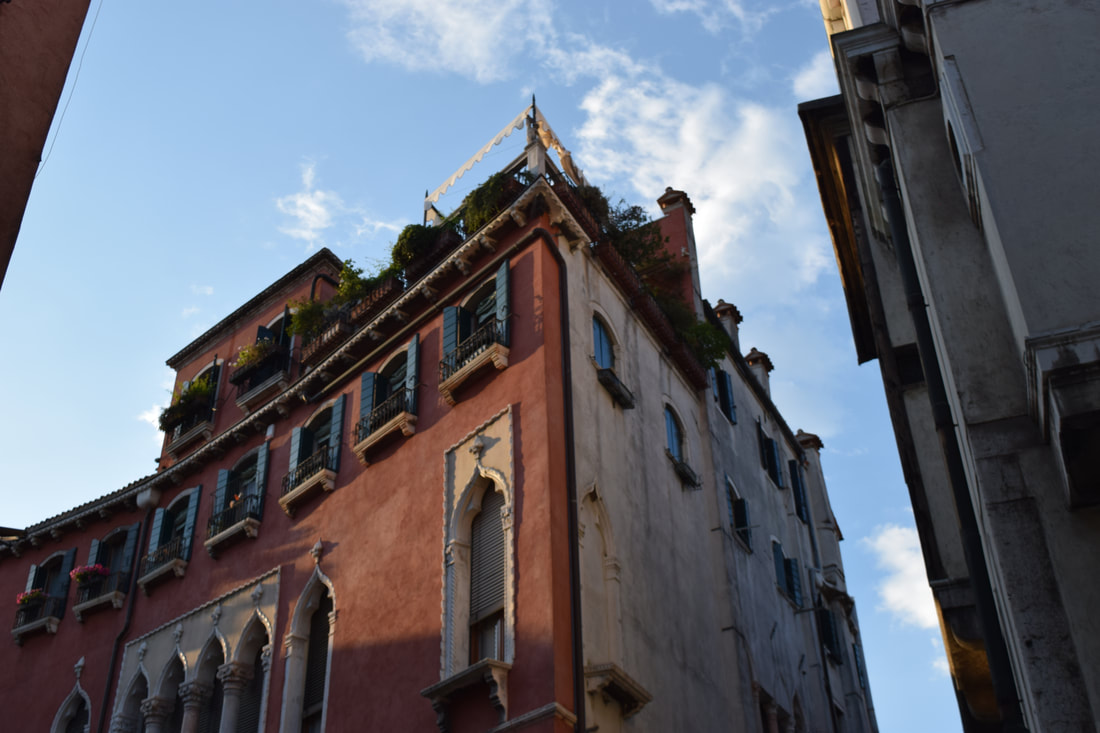
My print displays the architecture I found in Venice while strolling through the streets. The warm buildings contrasting the cool colored sky inspired me. It is of importance, given that it reminds me of the calm and relaxing days I enjoyed in Venice.
Symbolism:
I wanted to display the tranquility and stillness of the city through the light warm colors in the sky. The print stamped on the paper represents the city’s movement given the tourism, yet, there is still a sense of calmness in the atmosphere.
Design and Techniques:
To create my block’s design I decided to use an image. I began to do this by transferring my image, a photograph I took, into Photoshop where I added a black and white filter. This would allow the carving process to be more effortless and create a clear outline of the image. I wanted to have the building in my image printed leading me to carve around the building and inside as well. To create my final prints I decided to use watercolors to display the beautiful warm sunsets I saw in Venice. For my second final print, I decided to use the Chine de Collé technique and cut out the shape of the sky behind the buildings. This allowed the buildings to stand out adding depth to the print.
Spanish Personification:
Yo soy el edificio parada firme en medio de la conmoción
Yo soy la puesta de sol en calamidad
Yo soy el edificio intrincadamente diseñada